X
Our staff will contact you within 12 hours, You can also contact us through the following ways:
Contact US WhatsApp: +8618766656705
- Email: [email protected]
- Tel: +8618766656705
- Web: https://www.toponechain.com/

Jobs change mid-shift, angles tighten, and edges bite, so you need a plan that turns a lifting chain sling with hook into a predictable system. Start with marks you can read, then match the hook style to the route, and finally confirm geometry with numbers rather than guesses. This guide shows how hook choice changes control, how to size the path from master link to load, and how to run a short receiving and pre-lift check that crews finish every time.


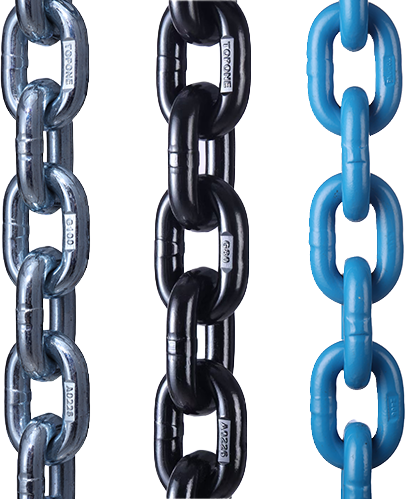
You anchor decisions to what the metal says. Links carry grade and size stamps (e.g., “8” for Grade 80 or “10” for Grade 100). The sling tag lists Working Load Limits (WLL) by hitch and by angle, plus serial/batch and manufacturer ID. Hooks, shackles, master links, and shorteners carry their own WLL and maker marks. You keep grades consistent and you let the lowest WLL in the path govern capacity. For rule sets, you follow ASME B30.9 for chain slings and ASME B30.26 (or EN 13889) for shackles; EN 818-4 guides short-link chain slings as well.
Hook style changes control, housekeeping, and risk. Choose by route, environment, and handling rhythm.
Hook type | What it solves | Best route | Watch-outs |
Self-locking hook | Latch locks under load, so stops and wind don’t shake it open | Long travel, deck motion, pauses mid-air | Keep the line straight into the bowl; avoid tip loading |
Spring-latch sling hook | Fast connects in sheltered space | Short, protected picks | Check latch action every lift; avoid vibration |
Foundry/clevis hook (wide throat) | Big eyes, bars, or thick plates | Supervised installs | Control swing; protect edges; never side-load |
Grab/shortening hook | Clean leg-length trim | Angle control at the head | Capture one full link centered in the pocket |
Keep hook grade and size aligned with the chain. The smallest WLL still rules the system.
A crowded hook throat breeds chatter and pinch. You seat a master link that clears the crane latch and you confirm free swing. When legs may sweep, you connect bow shackles at the head; you run the pin through the hardware and you face the bow toward the legs so the pin carries pure shear. If long travel twists the rig, you add an in-line swivel at the head and you keep the force strictly in line.
Angles multiply tension faster than any other variable, so you measure and adjust.
Hold a 60° included angle when space allows; reopen tight angles with a spreader or by trimming long legs with shorteners.
For two-leg work, compute tension per leg as Load ÷ (2 × sin θ), with θ from vertical.
For three- or four-leg slings, plan conservatively as if three legs carry while the fourth stabilizes, then size from the tag’s angle table.
You choose the hitch for contact surface and control, then you verify the WLL from the tag.
Vertical: seat the load deep in the hook bowl, align the eye to the pull, and keep the leg straight.
Choker: wrap slender loads, add a softener at the choke point, and re-check after the test bump.
Basket: cradle rounded loads, keep legs near vertical, and guard every edge.
Job scenario | Hitch | Hook choice | Why it works | Extra control |
Machinery lift with long travel | Vertical | Self-locking | Latch holds during stops and wind | In-line swivel at head if the line stays straight |
Narrow bay, quick resets | Vertical/Choker | Spring-latch sling | Fast connects, tidy layout | Short master-link sub-assembly |
Bars, thick plates, or cast eyes | Vertical | Foundry/clevis | Wide throat clears thick hardware | Guard corners; manage swing |
Leveling heavy skids | Vertical | Self-locking + head shorteners | Trim legs and lock the load | Angle card at the hook block |
You sign for gear only after you read and measure:
1. Lay the sling flat; roll links until grade stamps face up; clear twists.
2. Read the tag: standard, grade, size, WLL by hitch and angle, serial/batch, maker ID.
3. Read WLL stamps on hooks, shackles, master link, and shorteners; confirm one rating language.
4. Gauge link diameter and five-link pitch under light tension; log baselines.
5. Cycle hook latches ten times; confirm full closure; measure throat opening against the maker’s limit.
6. Inspect grab/shortener pockets; capture one full link only; reject peened or cracked pockets.
7. Photograph stamps and the tag; file images with the order.

8. Seat the master link in the crane hook; give the latch room to close.
9. Engage the chosen hook style at the load; align eyes to the line of pull.
10. Guard corners with rated protectors; tape guards in place if the route turns.
11. Snug the rig and measure angles with a card or an inclinometer.
12. Trim legs with head shorteners until the load sits level and angles match plan.
13. Test bump 150 mm; pause; check angle, latch closure, hook seating, and pin security.
14. Travel slowly; correct for wind early; land straight; unhook in reverse order.
Keep checks short, measurable, and logged with photos:
Tag & traceability: confirm grade, WLL by hitch and angle, serial/batch, maker ID.
Elongation & wear: measure five links for pitch growth; gauge crown diameter; retire legs at the maker’s limits.
Hook health: check latch springs, measure throat opening, scan saddle and neck for cracks or deep scars.
Shackles: verify straight pins and clean threads; prefer bolt-type pins for vibration and fit cotters.
Shorteners: inspect sidewalls and faces; reseat a full link; remove burrs before service.
Records: attach proof-test certificates and the latest inspection sheet to the sling file.
Chain size (mm) | Common hook pairings | Field fit notes |
6–8 | Self-locking, sling, grab | Ensure the bowl seats one link; confirm latch clears the eye |
10 | Self-locking, grab, foundry | Guard sharp padeyes; check hook throat vs link OD |
13–16 | Self-locking, grab | Verify master-link inside width vs crane hook latch |
Always use the manufacturer’s tables for exact pairings and WLL.
Trusting paint over stamps. You read marks on metal, not colors.
Half-link capture in a grab. You reseat a full link or you rebuild the connection.
Tip loading. You place the load deep in the hook bowl and keep the line in plane.
Guessing at angles. You measure θ, you size from the tag, and you record the read.
Mixing grades. You keep one family across chain, hook, shackles, and head; the lowest WLL rules.
Read the steel, match the hook to the route, measure angles with tools, protect edges, and log inspections, and your lifting chain sling with hook will deliver clean, predictable lifts shift after shift—contact TOPONE CHAIN today for certified chain slings, matched hooks, and full documentation for your next job.
Understanding DIN 766 Chain Specifications: A Comprehensive Guide for Industrial Applications
Chain Grades & Markings — Understanding the Strength Behind the Numbers
2 Ton & 3 Ton Chain Block: Load Limits, Specs & Industrial Uses
Stainless vs. Carbon Steel Chains: Key Differences
What are the Differences Between Types of Shackles?