X
Our staff will contact you within 12 hours, You can also contact us through the following ways:
Contact US WhatsApp: +8618766656705
- Email: [email protected]
- Tel: +8618766656705
- Web: https://www.toponechain.com/

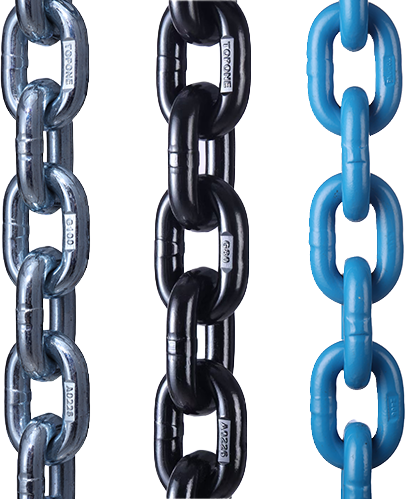
Big picks punish guesswork, so you treat heavy lifting chains as an engineered system from crane hook to load. You start at the head, then you set geometry with numbers, and finally you document capacity with stamps, tags, and proof data. This guide focuses on welded round-link chain slings used for heavy lifts: how to choose grade and diameter, how to build a calm head, how to manage angles and dynamic effects, and how to inspect parts so every leg carries what you expect.

Heavy means high consequence and high tension. You keep control by defining the sling layout first, not last.
Single-leg when the lift runs vertical into a rated lug and you only need strength.
Two-leg when you span symmetrical padeyes and want simple leveling.
Three-leg when one face offers three solid points and you need stability.
Four-leg when you must control pitch and roll on frames or skids; plan conservatively as if three legs carry while the fourth stabilizes.
You build around welded round-link chain because it tolerates abrasion, short bend radii around hardware, and fast length control with rated shorteners.
A crowded head creates pinch and chatter. Seat a lifting chain master link that clears the crane latch and centers in the hook bowl.
Keep inside width generous so the latch closes freely.
Match the sub-assembly (intermediate links) to leg count and chain diameter.
Read the WLL on the master link body and let the lowest WLL in the path govern the sling.
Pick metal for the environment, then size from the tag.
Grade 80 alloy (typ. 20Mn2): reliable workhorse for shops, yards, and harsh steel.
Grade 100 alloy: ~25% higher WLL than G80 for the same diameter, so you hold angles when headroom shrinks.
Stainless 304/316: resists splash and washdown; match stainless hooks and shackles to reduce galvanic pairs.
Coated alloy (e.g., Zn–Ni + sealer): sheds coastal salt; rinse and oil pivots after splash.
Angles raise leg tension faster than any other factor. Measure, then trim.
Target an included angle ≈ 60° between adjacent legs when space allows
For two legs, compute per-leg tension as:
Tleg=Load÷(2×sinθ)T_{ ext{leg}} = ext{Load} div (2 imes sin heta) with θ from vertical.
For three/four legs, size conservatively as if three legs carry; then equalize with head-mounted shorteners by capturing one full link centered in each pocket.
Included angle | Tension trend | Action you take |
60° | Baseline | Proceed and verify with the tag table |
45° | Rises noticeably | Trim legs; consider a spreader |
30° | Spikes fast | Redesign geometry before the lift |
Tape this on the hook block so crews check numbers, not memory.
Self-locking hooks at the load end for long travel, wind, or pauses; the latch locks under load.
Bow shackles wherever legs may sweep at the head or load; run the pin through the hardware and face the bow toward the legs so the pin works in pure shear. Prefer bolt-type pins for vibration.
Shortening clutches / grab hooks mounted at the head for tidy leg-length control; seat one full link—never a half link.
In-line swivel only when the force stays straight; a swivel never cures side-loading.
Heavy modules rarely move like drawings promise. Cranes accelerate, decks heave, and air brakes nudge. You plan a modest dynamic amplification margin per your site rules, you test-bump 100–150 mm, you pause, then you re-read angles and latches before travel. During long lowers, you keep spotters on corners and correct early for wind.
Chain Ø (mm) | G80 WLL | G100 WLL |
10 | 3.2 t | 4.0 t |
13 | 5.3 t | 6.7 t |
16 | 8.0 t | 10.0 t |
20 | 12.5 t | 16.0 t |
22 | 15.0 t | 19.0 t |
26 | 21.2 t | 26.5 t |
*Use your sling tag and the manufacturer’s table for exact values before any lift.
Receiving (bench, 12 minutes):
1. Lay legs flat; roll links so grade and size stamps face up.
2. Read the sling tag: standard, grade, size, WLL by hitch/angle, serial/batch, maker ID.
3. Read WLL stamps on master link, sub-links, hooks, shackles, and shorteners.
4. Gauge crown diameter and five-link pitch under light tension; log baselines.
5. Cycle hook latches ×10; measure throat opening; reject out-of-spec parts.
6. Inspect shortener pockets for peening or cracks; remove burrs; prove full-link seating.
7. Photograph marks and the tag; file with proof-test certificates.
Pre-lift (deck):
8. Seat the master link; confirm latch clearance and free swing.
9. Align end fittings to the line of pull; seat loads deep in the hook bowl.
10. Fit corner guards wherever chain meets a radius or edge.
11. Measure angles on both faces with a card or inclinometer; trim opposite legs evenly.
12. Test-bump, pause, re-check angles, latch closure, and pin security; only then travel.
Elongation: measure five consecutive links; retire legs at the maker’s limit.
Wear: gauge crown diameter and compare to the published wear limit.
Hooks: check throat opening, latch function, and cracks at saddle/neck.
Shackles: verify straight pins and clean threads; fit cotters on bolt-types.
Swivels: rotate under no load; reject any unit with side-load scars.
Records: keep proof-test sheets tied to serials; store photos of all stamps.
Symptom | Likely cause | Fast fix |
Slack leg after snugging | Length mismatch or out-of-plane padeye | Trim the diagonal partner a step; re-bump |
Head chatter in the hook | Crowded master link or pinch | Upsize head; verify latch clearance |
Hook opens in stops | Spring-latch used on windy route | Switch to self-locking hooks |
Twisting during travel | Unequal angles or route-induced spin | Reopen angles with a spreader; add in-line swivel only if force stays straight |
Scars at corners | No guarding on edges | Install guards; reroute to the true line of pull |
Black-oxide or phosphate G80/G100 reads clearly in shops and wipes clean fast. Zn–Ni coatings resist coastal splash; rinse and oil pivots after salt. Stainless 304/316 suits washdown and hygiene sites; store stainless away from carbon racks to reduce cross-contamination. Whatever you choose, you keep one rating language across chain, head, hooks, shackles, and shorteners; the smallest WLL still rules.
Fit the crane hook first, match grade and diameter to the site, measure angles with tools, and document every mark, and your heavy lifting chains will move high-consequence loads with calm, predictable control—contact TOPONE CHAIN today for certified heavy-duty round-link chain slings and matched hardware.
Understanding DIN 766 Chain Specifications: A Comprehensive Guide for Industrial Applications
Chain Grades & Markings — Understanding the Strength Behind the Numbers
2 Ton & 3 Ton Chain Block: Load Limits, Specs & Industrial Uses
Stainless vs. Carbon Steel Chains: Key Differences
What are the Differences Between Types of Shackles?
Manual Chain Hoist vs Lever Chain Hoist | Which 2 Ton Hoist to Choose
Advanced Adjustable Chain Sling Solutions
Lifting Chain Sling with Hook: Make Smart Picks
2-Leg Lifting Chain Sling: Setup & Safety Guide
Understanding DIN 766 Chain Specifications: A Comprehensive Guide for Industrial Applications