X
Our staff will contact you within 12 hours, You can also contact us through the following ways:
Contact US WhatsApp: +8618766656705
- Email: [email protected]
- Tel: +8618766656705
- Web: https://www.toponechain.com/

Tight bays, odd shapes, and fast resets push crews to simplify. An endless chain sling does exactly that: one continuous loop lets you choke, basket, or lift vertically without swapping gear. You still need clean rules, though. Read the tag and stamps, match grades across fittings, set angles with numbers, and guard edges before the pick. This guide shows how to choose materials, configure hitches, build the hook connection, and run short inspections that auditors accept without debate.

You gain three working modes without re-rigging:
Vertical: hook one bight and lift straight up when a rated lug sits ready.
Choker: wrap the loop around a slender load to resist roll and drift.
Basket: cradle a rounded load with two rising legs and keep faces clean.
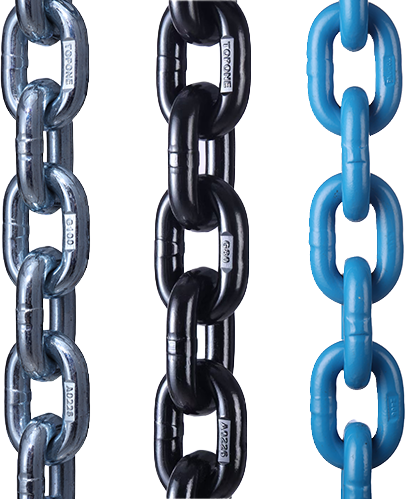
You read the sling tag first: it lists Working Load Limits (WLL) by hitch and by angle, plus serial/batch and maker ID. Links carry grade and size stamps (e.g., “8” for Grade 80, “10” for Grade 100). Hooks, shackles, and any coupling link show their own WLL and IDs. You keep every component in one rating family and you let the smallest WLL in the path set capacity.
Match the loop to the environment, then size from the tag.
Grade 80 alloy (round-link, quenched and tempered) handles abrasion, hot sparks, and daily resets in shops and yards.
Grade 100 alloy delivers higher WLL for the same diameter, so you keep angles friendly without jumping sizes.
Stainless (304/316) resists pitting in washdown or splash zones; you pair stainless hooks and shackles to curb galvanic attack.
Coated alloy (e.g., zinc–nickel with a sealer) sheds salt in coastal work; you still rinse and oil pivots after splash.
You create a calm head and a straight load path:
At the hook: seat a master link or a bow shackle that clears the crane latch. Run a shackle pin through the hardware and face the bow toward the chain so the pin works in pure shear.
At the load: choose self-locking hooks for long travel, wind, or stops; keep spring-latch sling hooks for short, protected moves.
Length control: when you must fine-tune the bight, add a rated shortening clutch or grab on the loop and capture one full link, centered in the pocket—never a half link.
Pick the mode for the geometry you see, then verify with the tag.
Vertical: you grab one bight in the hook or shackle, align the eye to the line of pull, and seat the hook in the bowl, not on the tip.
Choker: you wrap the loop, seat the hook or shackle cleanly, and guard the choke point because pressure concentrates there.
Basket: you pass the loop under the load and bring both legs up to the hook; you keep legs vertical and you check the manufacturer’s bend requirements at the contact radius.
Hitch Mode | Best For | Key Checks | Field Tip |
Vertical | Rated lug or padeye | Tag’s vertical WLL; hook seating | Keep the leg straight from hook to load |
Choker | Slender shapes that tend to roll | Guard at choke; clean seating | Add a softener; re-check after the test bump |
Basket | Rounded drums, pipe, or beams with guards | Two near-vertical legs; bend radius | Keep legs equal; avoid twist into the hook |
Confirm exact WLL values on the sling tag before any pick.
Angles change leg tension fastest, so you measure rather than guess. Hold an included angle near 60° in basket lifts when space allows; reopen tight angles with a spreader or by trimming the loop with a rated shortener.
Two-leg quick check (for a basket)
Tension per leg = Load ÷ (2 × sin θ), with θ measured from vertical on one leg.
You record θ on an angle card, then you size from the tag’s table before you lift.
1. Lay the sling flat; roll links until grade stamps face up; clear twists.
2. Inspect the loop: check crowns for wear, look for peening or cracks at weld toes, and confirm tag legibility.
3. Inspect fittings: read WLL on hooks, shackles, and any shortener; match grades and sizes to the chain.
4. Fit the head: seat the master link or shackle in the crane hook and confirm latch travel.
5. Build the hitch: set vertical, choker, or basket as planned; align eyes and hook bowls to the line of pull.
6. Guard edges: place corner guards wherever the loop touches a radius or plate edge.
7. Snug and measure: read angles with a card or an inclinometer; trim with the shortener if you staged one.
8. Test bump 150 mm; pause; re-check angles, latch closure, and pin security.
9. Travel slowly; land straight; release tension; unhook in reverse and log photos.
You keep checks simple so crews finish them every shift:
Tag & traceability: verify grade, size, WLL by hitch and angle, serial/batch, and maker ID.
Elongation: measure five consecutive links under light tension; retire loops that exceed the maker’s limit.
Crown wear: gauge link diameter; follow the published wear limit for your brand and standard.
Surface condition: remove burrs; reject heat-tinted areas after hot work unless the maker allows service.
Hooks & latches: cycle ten times; verify throat opening and smooth closure; replace scarred or cracked hooks.
Shackles: confirm straight pins and clean threads; use bolt-type pins for vibration and fit the cotter.

Trusting paint over stamps. Read the tag and the steel; finish only helps housekeeping.
Half-link capture in a grab. Seat a full link or rebuild the connection.
Tip-loading the hook. Seat loads deep in the bowl and keep the line in plane.
Skipping guards on baskets. Guard before the pick, not after the scar.
Guessing at angle. Measure θ and use the tag’s table; numbers beat memory.
You chase speed and flexibility on mixed jobs: one loop covers vertical picks, quick chokers on beams, and baskets under drums or pipe—often with only a hook or shackle change at the head. You also thread tight routes more easily than with rigid bridles and you clean the sling fast at shift end, which keeps stamps readable and audits short. For long travel or wind, you add self-locking hooks; for fine length control, you stage a head-mounted shortener. When loads demand strict geometry or four corner control, you step up to a two-, three-, or four-leg assembly.
Read stamps, pick materials for the site, choose the right hitch, measure angles with tools, protect edges, and log inspections, and your endless chain sling will handle daily lifts with clean, predictable control—contact TOPONE CHAIN today for certified endless chain slings, matched hardware, and full documentation for your next job.
Understanding DIN 766 Chain Specifications: A Comprehensive Guide for Industrial Applications
Chain Grades & Markings — Understanding the Strength Behind the Numbers
2 Ton & 3 Ton Chain Block: Load Limits, Specs & Industrial Uses
Stainless vs. Carbon Steel Chains: Key Differences
What are the Differences Between Types of Shackles?