X
Our staff will contact you within 12 hours, You can also contact us through the following ways:
Contact US WhatsApp: +8618766656705
- Email: [email protected]
- Tel: +8618766656705
- Web: https://www.toponechain.com/

Straight picks look simple, yet they hide traps: offset eyes, sharp edges, and surprise motion. A chain sling single leg solves these jobs because it reads clearly, resists abrasion, and carries traceable markings. You still need a tight method: read the tag and stamps, build one rating path from hook to load, set geometry with numbers, and finish a short inspection that crews repeat every shift. Use this guide to choose fittings, plan hitches, protect corners, and document each lift with proof you can show during audits.

Pick a single leg when the lift pulls straight up-and-down and the load gives one rated attachment point. You gain speed and clarity because one tag defines capacity, one leg sets geometry, and one hook controls release. You also thread narrow routes more easily than with multi-leg bridles, and you guard fewer corners. If the route demands attitude control or the CG sits off-center, step up to a two-, three-, or four-leg system instead of forcing one leg to do two jobs.
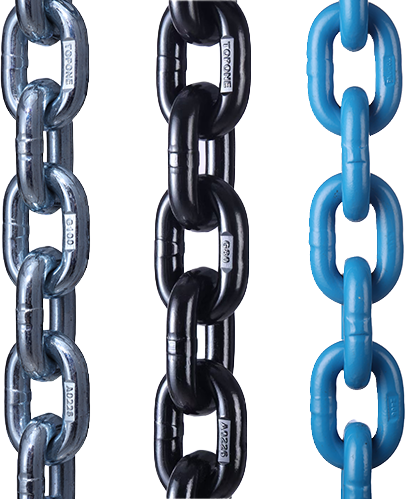
Start at the link. You find a grade stamp (e.g., “8” for Grade 80 or “10” for Grade 100) and a size mark. Then read the sling tag: it lists Working Load Limits (WLL) by hitch (vertical, choke, basket), angle notes, and a serial or batch ID with the manufacturer ID. Hooks, shackles, and master links carry their own WLL and marks. You keep every component in the same rating family and you let the lowest WLL in the path govern the sling.
Common rule sets you reference: ASME B30.9 and EN 818-4 for chain slings; ASME B30.26 / EN 13889 for shackles and many fittings.
Master link: seat it freely in the crane hook and give the latch room to close. As a field habit, keep inside width generous relative to chain diameter so the hook never pinches the head.
Hook at the load: use a self-locking hook when travel runs long, wind builds, or the lift pauses; the latch locks under load and stays shut. Use a spring-latch sling hook only for short, protected moves.
Shackles: when you connect to a padeye, run the pin through the hardware and face the bow toward the chain so the pin carries pure shear. Choose bolt-type pins for vibration or long travel; fit the cotter and re-check after the test bump.
One leg still gives options; you choose by the load face and the route.
Vertical hitch: cleanest method for a straight pull. You load the hook bowl, not the tip, and you keep the line in plane.
Choker hitch: you wrap the leg through the attachment and grab the back of the link with the hook; you control roll on slender loads. You still protect corners because choke points concentrate pressure.
Basket hitch: you pass the leg under a rounded load and bring the hook back to the head or another rated point. You check the D/d ratio at the bend and you keep both legs vertical at the hook. If the load shifts, switch to a bridle instead of fighting roll with one leg.
Scenario | Best Hitch | Hook Choice | Extra Controls | Why it works |
Rated padeye, straight pull | Vertical | Self-locking | Edge guards as needed | Simple geometry and fast release |
Slender beam that wants to roll | Choker | Self-locking | Softener at choke | Wrap resists roll; protect the choke point |
Rounded drum or pipe | Basket | Self-locking | D/d check, guards | Two vertical paths share geometry cleanly |
Tight headroom | Vertical | Self-locking | Short master link sub-assembly | Short head fits the hook and clears latches |
Long travel with stops | Vertical | Self-locking | In-line swivel at head (if line stays straight) | Swivel bleeds twist without side load |
Always size from the sling tag and the component markings.
Even one leg can see bad angles when rigging crowds the hook. Measure the line from vertical with an angle card or a compact inclinometer and keep the leg straight. If the path forces an angle, log the value and consult the tag’s table before you lift. When space allows, add a short spreader or a rigging block to realign the hook and the leg so the force stays in plane.
Two simple habits:
1. Seat loads deep in the hook bowl; avoid tip loading.
2. Keep the chain untwisted into the hook; remove twists on the ground, not in the air.
Edges win against steel every time. Guard any corner where the chain touches a radius or plate edge. Use rated corner guards or softeners, and tape them in place if the route includes tight turns. Remember: stainless fights corrosion, not cutting; alloy crowns still scar on sharp edges. Guard first, then pick.

1. Lay out the sling; roll links until grade stamps face up and the leg stays untwisted.
2. Inspect the master link, hook, and any shackle; replace cracked or peened parts.
3. Check the tag: grade, WLL by hitch, angle notes, serial/batch, and maker ID.
4. Seat the master link in the crane hook; close the latch and confirm free swing.
5. Connect at the load: align to the true line of pull and seat the hook bowl.
6. Add guards or softeners wherever the chain meets a radius or an edge.
7. Snug the rig and measure the angle from vertical; adjust the layout if needed.
8. Lift 150 mm, pause, and re-check latch closure, alignment, and clearances.
9. Travel slowly; set the load down straight; release tension; unhook in reverse order.
Keep it short, measurable, and logged with photos so the next crew trusts the gear.
Tag & traceability: read grade, WLL by hitch, angle notes, serial/batch, and maker ID.
Elongation: measure five consecutive links under light tension; retire legs that exceed the manufacturer’s elongation limit.
Crown wear: gauge link diameter at the crowns; retire at the published wear limit for your brand and standard.
Hook health: cycle the latch ten times; verify throat opening; reject cracks at the saddle or neck; confirm smooth latch closure.
Shackles: check pin straightness and threads; use bolt-type pins for vibration and fit the cotter.
Surface condition: remove burrs at contact points; dress minor peening; replace parts with deep scars.
Item | Purpose | Field note |
Angle card / inclinometer | Verify geometry | Tape it to the hook block for quick reads |
Corner guards / softeners | Protect edges | Place before the pick, not after the scar |
Bolt-type shackles | Secure padeye links | Pin through hardware; bow toward chain |
In-line swivel (optional) | Control twist | Use only when the line of force stays straight |
Cleaning & lube kit | Tag readability and hinge life | Wipe stamps; oil pivot points after splash |
Match metal to the job, then size from the tag. Grade 80/100 alloy with black-oxide or phosphate reads well in shops and yards and wipes clean fast. Zinc–nickel coatings help in coastal work; rinse after splash and oil pivots lightly. Stainless (304/316) supports washdown and hygiene rules; pair it with stainless shackles and hooks when you can to reduce galvanic attack. Whatever you choose, you still read the steel and you still let the lowest WLL in the path set capacity.
Trusting color over stamps. Read the tag and the steel; finish only helps housekeeping.
Tip loading the hook. Seat the load deep in the bowl and keep the line in plane.
Skipping guards. Install edge protection before the pick and reroute around knife-like corners.
Ignoring angle reads. Measure from vertical, log the number, and adjust the setup.
Using a swivel to mask misalignment. Keep the swivel strictly in line or remove it.
Read stamps, match the path from hook to load, measure geometry, guard edges, and log inspections, and your chain sling single leg will move straight-up picks with clean, predictable control—contact TOPONE CHAIN today for certified single-leg chain slings and complete documentation for your next job.
Understanding DIN 766 Chain Specifications: A Comprehensive Guide for Industrial Applications
Chain Grades & Markings — Understanding the Strength Behind the Numbers
2 Ton & 3 Ton Chain Block: Load Limits, Specs & Industrial Uses
Stainless vs. Carbon Steel Chains: Key Differences
What are the Differences Between Types of Shackles?