X
Our staff will contact you within 12 hours, You can also contact us through the following ways:
Contact US WhatsApp: +8618766656705
- Email: [email protected]
- Tel: +8618766656705
- Web: https://www.toponechain.com/

Ports move fast and yards stay rough, yet you still need clean rules when you plan lifting containers with chains. You start with the container’s corner castings and the maker’s handling instructions, then you choose certified chain slings, rated lifting lugs, and shackles that speak one rating language. Next, you control angles with numbers, not guesses, and you log inspections so any audit runs smoothly. This guide shows how welded round-link chain fits container work, how to build the rig from hook to casting, and how to run a short, repeatable setup on every pick.

You lift only through corner castings or certified padeyes that the container maker specifies. You select container lifting lugs designed for top, side, or bottom apertures; the lug manufacturer publishes Working Load Limits (WLL) and shows the correct orientation. You confirm that the container data plate remains legible and that each casting shows no cracks, egg-shaping, or weld separation. Industry rules such as ISO handling guidance for Series 1 freight containers define allowed methods and geometry; you treat that guidance and the container manual as the plan, then you size the rig from the smallest WLL in the chain.
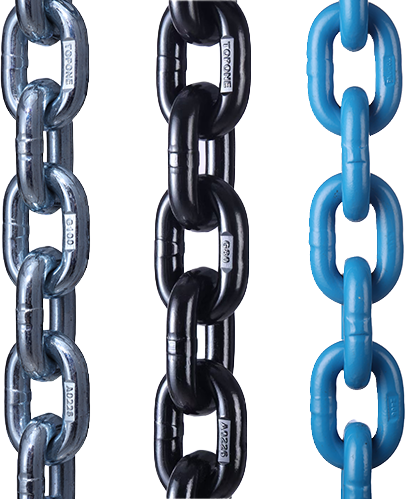
Welded round-link chain slings handle abrasion, shock, and tight steel around containers. You pick Grade 80 or Grade 100 alloy chain for overhead lifting because links carry stamped grade marks and sizes, and the sling tag lists WLL by hitch and by angle. Many yards run G80 based on 20Mn2 alloyed steel for strength and toughness; coastal or splash zones often call for 304/316 stainless chain and fittings to curb pitting and staining. You keep grades consistent across every component; the lowest rating rules the assembly.
Treat lifting containers with chains as a system, not a pile of parts:
Spreader beam: you keep legs near vertical and you clear roof bows or antennas; you size the beam to match container length.
Master link: you seat the head cleanly in the crane hook; as a field rule, you keep inside width ≥ 5× chain diameter so the latch clears.
Chain legs: you use equal lengths; you fit shorteners at the head so you trim legs without re-rigging.
Hooks and shackles: you choose self-locking hooks at the lugs or you pin bow shackles through the lifting lugs; you face the bow toward the legs and you run the pin through the hardware so the pin carries pure shear.
Lugs: you select top-lift, side-lift, or bottom-lift lugs that match the casting and publish a WLL that meets or exceeds your plan.
You photograph stamps and tags—grade on links, WLL on fittings, serial or batch numbers on the sling tag—and you file them with the lift plan.
Lug Type | Connection Point | Typical Use Case | Notes for Chain Rigs |
Top-lift lug | Top corner casting | Crane picks with spreader | Keep legs near vertical; use self-locking hooks or shackles |
Side-lift lug | Side apertures in castings | Yard cranes and mobile rigs | Add spreader to hold geometry and protect walls |
Bottom-lift lug | Bottom castings | Lifts from low headroom or pit | Guard edges; confirm floor clearance and door security |
Always confirm the lug’s WLL and orientation diagram before you lift.
Chains carry the load cleanly when you keep angles honest. You plan a 60° included angle whenever the site allows; you add a spreader or you shorten long legs evenly when headroom squeezes. You measure, not guess.
Two-leg quick check
Tension per leg = Load ÷ (2 × sin θ), where θ equals the angle from vertical of one leg.
Four-leg planning
You plan conservatively as if three legs carry while the fourth balances, then you choose diameter from the sling tag’s angle table. You pause after a 150-mm test lift, you re-check angles and clearances, and you adjust before you travel.
Included Angle (between legs) | θ from Vertical | Per-Leg Factor × Load |
60° | 30° | 1.00 |
45° | 22.5° | 1.19 |
30° | 15° | 1.93 |
Tape this card to the spreader so crews size legs with numbers, not hunches.
1. Survey the box: you read the CSC/data plate and you inspect each corner casting for cracks, elongation, and corrosion.
2. Pick the method: you choose top-, side-, or bottom-lift lugs that match the castings and the rig geometry.
3. Lay out the sling: you roll links until grade stamps face up; you confirm equal leg lengths and free swing at the head.
4. Fit the head: you seat the master link; you check hook latch travel; you clear antennae, HVAC units, or rooftop gear.
5. Connect the lugs: you pin bow shackles or engage self-locking hooks; you align eyes to the line of pull.
6. Set angles: you snug the rig; you measure angles with a card or an inclinometer; you trim legs with shorteners until you hit plan.
7. Guard corners: you fit wear sleeves wherever chain meets a radius or door frame; you secure doors and any interior load.
8. Test lift: you raise 150 mm; you pause; you re-check latches, shackle pins, angle, balance, and interference.
9. Travel: you move slowly; you avoid twist; you keep spotters on all four corners; you land straight and release tension before you unhook.
You run short, objective checks before the first pick and you log them with photos:
Tag & traceability: you confirm grade, WLL by hitch and angle, serial/batch, and maker ID.
Pitch growth: you measure five consecutive links under light tension; you retire legs that exceed the maker’s elongation limit.
Crown wear: you gauge link diameter; you retire legs at the published wear limit for your brand and standard.
Hooks & latches: you cycle the latch ten times; you verify throat opening; you reject cracks at the saddle or neck.
Shackles & pins: you check threads and straightness; you fit cotters on bolt-types; you replace bent pins.
Lugs: you inspect bodies and pins for peening or deformation; you confirm the correct orientation in the casting.
Records: you store the proof-test and the last inspection sheet with the lift file.
You handle abrasion, shock, and repeat cycles better with round-link chain than with webbing, and you route chain through tight steel without large bend radii. You also shorten legs fast and reopen angles without a re-rig, so you keep the head balanced when the deck moves or when a chassis sits out of level. Wire rope rigs still carry value on high-heat paths and long reaches, and web slings still protect fresh paint on specialty modules, yet welded link chain often wins for container lifts in rough yards and marine weather.
You label the rig set for containers and you keep it separate from transport tie-down gear. You mark the spreader with length and headroom limits. You keep stainless away from carbon-steel racks to reduce cross-contamination, and you rinse coated alloy after salt exposure. You back every job with photos of stamps, the lug orientation diagram, the angle card reading, and the test-lift pause. Auditors ask for numbers; you keep them ready.
Read the castings, choose certified lugs, match grades across the chain system, measure angles with tools, and log inspections, and lifting containers with chains will run clean across ports, yards, and decks—contact TOPONE CHAIN today for certified round-link chain slings, matched container lugs, and full documentation for your next lift.
Understanding DIN 766 Chain Specifications: A Comprehensive Guide for Industrial Applications
Chain Grades & Markings — Understanding the Strength Behind the Numbers
2 Ton & 3 Ton Chain Block: Load Limits, Specs & Industrial Uses
Stainless vs. Carbon Steel Chains: Key Differences
What are the Differences Between Types of Shackles?