X
Our staff will contact you within 12 hours, You can also contact us through the following ways:
Contact US WhatsApp: +8618766656705
- Email: [email protected]
- Tel: +8618766656705
- Web: https://www.toponechain.com/

Odd pick points, tight headroom, and moving decks turn simple lifts into puzzles. You solve them when you treat custom lifting chain slings as engineered systems, not catalog parts. Start with standards and traceability, then map geometry, choose architecture, select materials, and lock in the right end fittings. Next, you proof, mark, and document the assembly, and you finish with a clear setup and inspection routine. Follow this playbook and you will lift cleanly, record every decision, and pass audits without drama.

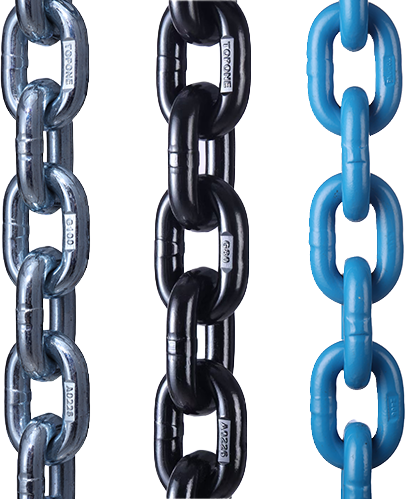
You anchor every custom order to recognized rule sets and readable marks. Chain links carry grade and size stamps; hooks, shackles, and master links carry Working Load Limit (WLL) and maker IDs; the sling tag lists WLL by hitch and by angle, plus serial/batch for traceability. You size the system from the lowest WLL in the path and you reference ASME B30.9 / B30.26 or EN 818-4 / EN 13889 throughout the spec and the inspection sheet.
You sketch before you select hardware. Note the center of gravity, the pick points, their elevations, and any obstacles along the route. Measure headroom and choose a target angle; crews hit ≈60° included angle whenever space allows because tension stays predictable. If you run two legs, compute leg tension directly:
Two-leg quick check:
Tension per leg = Load ÷ (2 × sin θ), with θ measured from vertical for one leg.
For three- or four-leg slings, plan conservatively as if three legs carry while the fourth stabilizes, then size legs from the tag’s angle table.
Custom work rewards the right layout:
Single-leg for straight vertical picks or dedicated fixtures.
Two-leg when you span balanced padeyes and want quick resets.
Three-leg when one face offers three sound points and geometry hates symmetry.
Four-leg when you need diagonal control and a stabilizer on every corner.
Add head-mounted shorteners for fast, tidy length trim; crews shorten opposite legs evenly and reopen tight angles without a re-rig. Use equalizer heads or a spreader when headroom squeezes and torsion threatens.
Match metal to the environment, then confirm WLL on the tag for the chosen size.
Grade 80 alloy steel (e.g., quenched-and-tempered round-link) handles abrasion, sparks, and daily resets in shops and yards.
Grade 100 alloy boosts strength for the same diameter and helps when your angle plan still pushes leg tension high.
Stainless (304/316) supports washdown and splash zones; you limit galvanic pairs by matching stainless hooks and shackles where practical.
Coated alloy (e.g., zinc–nickel with sealer) sheds salt and cleans fast on coastal work.
You still size from the tag, you still log proof results, and you still inspect crowns, pockets, and hooks with numbers, not hunches.
You choose self-locking hooks when travel runs long, wind builds, or the lift pauses mid-air; the latch locks under load and stays shut. You reserve spring-latch sling hooks for short, protected moves. You add bow shackles where legs may sweep at the head or load; you run the pin through the hardware and face the bow toward the legs so the pin carries pure shear. For length control, you spec grab/shortening hooks or shortening clutches and you capture one full link centered in the pocket—never a partial link.
Required Input | What You Capture | How It Drives the Design | What You Verify |
Load data | Weight, CG, lift points, drawings | Leg count, chain Ø, hook type | Per-leg tension vs angle table |
Geometry | Headroom, path, obstructions | Spreader need, equalizer, shorteners | Latch clearance and master-link fit |
Environment | Salt, washdown, heat, chemicals | Alloy vs stainless; coatings | Material pairing and derating notes |
Motion | Travel distance, wind, pauses | Self-locking hooks, in-line swivel | Straight load path; no side load |
Interfaces | Padeye sizes, eye radii, thread specs | Shackles, hook throat, guards | Bearing fit; edge protection |
Compliance | Applicable standards and site rules | Tag format, stamp set, proof plan | Serial/batch traceability |
You request a proof-test statement matched to the sling serial; you confirm grade and size stamps on links and WLL marks on every fitting; you keep the tag legible with WLL by hitch and angle. You shoot photos of each mark, you store the proof sheet with the lift plan, and you attach a quick reference (angle factors, inspection limits) to the rig record so audits stay short.
Run one repeatable sequence on the ground, then at the hook:
1. Lay out the sling; roll links until stamps face up; remove twists.
2. Inspect shorteners, hooks, shackles, master link, and any swivel; replace scarred or cracked parts.
3. Seat the master link in the crane hook; keep inside width generous so the latch closes freely.
4. Connect at the load; align eyes and shackles to the line of pull; seat hooks deep in the bowl.
5. Snug the rig and measure angles with a card or an inclinometer at each active leg.
6. Trim legs with shorteners in small, opposite steps until the attitude matches the plan.
7. Guard edges wherever chain meets a radius or door frame.
8. Lift 150 mm, pause, re-read angles, latch closure, and pin security; only then travel.
9. Land straight, release tension, unhook in reverse, and log final notes.
Keep checks short and measurable so crews finish them every shift:
Tag & traceability: read grade, WLL by hitch and angle, serial/batch, maker ID.
Pitch growth: measure five consecutive links under light tension; retire legs that exceed the maker’s elongation limit.
Crown wear: gauge link diameter; retire legs at the published wear limit for your brand and standard.
Hooks & latches: cycle latches ten times; verify throat opening; reject cracks at saddle or neck.
Shorteners & pockets: inspect faces and sidewalls; remove burrs; capture one full link centered.
Shackles: check threads and straightness; use bolt-type pins for vibration; fit cotters and re-check after the test bump.
Swivels: confirm axial alignment and free rotation; replace any unit that binds or shows side-load scars.
Slack leg after snugging? Shorten the diagonal partner a half-step and re-bump.
Head twist on travel? Open angles with a spreader and add an in-line swivel only if the line of force stays straight.
Hook chatter at stops? Swap to self-locking hooks and keep the load deep in the bowl.
Corner scars after landing? Fit guards before the next pick and reroute legs to a true line of pull.
Pin creep under vibration? Move from screw-pin to bolt-type shackles and log the change on the lift sheet.
Tape an angle card to the head; store proof-test sheets and inspection logs with the serial; add a QR code to the tag that links to the current record if your site allows it. Crews then verify marks, read the angle plan, and close the loop before the lift ever leaves the deck.
Define the job with drawings and numbers, select architecture and materials for the site, match fittings to motion, then proof, mark, and log everything—and your custom lifting chain slings will carry complex lifts with clean, predictable control—contact TOPONE CHAIN today for engineered custom chain slings, matched hardware, and full documentation for your next project.
Understanding DIN 766 Chain Specifications: A Comprehensive Guide for Industrial Applications
Chain Grades & Markings — Understanding the Strength Behind the Numbers
2 Ton & 3 Ton Chain Block: Load Limits, Specs & Industrial Uses
Stainless vs. Carbon Steel Chains: Key Differences
What are the Differences Between Types of Shackles?